“Tool storage… err... what’s that?”. No matter whether you're a handy homeowner, an experienced engineer or a wielding woodworker, you need somewhere to put your tools. And if you want to find them (in one piece), a pile in the corner of your shed isn’t going to cut it. With countless tool storage tips and tricks and even best practices for tool organisation out there, let’s saw to the chase and see how you can optimise your tool storage the right way.
Why storage matters: it’s personal
How and where you store your tools is a very personal (and sometimes touchy) endeavour. It needs to work for you and the space you have available.
Because, of course, storing your tools under the kitchen sink is going to look very different to storing them in your garage. And how you plan to use your tools will change the approach you take. But ultimately, if you’re the only one using and seeing them, then how you store your tools is for your eyes only…
Why storage matters: satisfaction guaranteed
A thin cloud of smoke seeps from under your cupboard door with “Police box” just visible along the top. The door, stiff, creaks as it opens. Your hairs stand on end. Shivers run down your spine. You pause. Step back. And think “Corr, adding that smoke machine and painting the door blue really was worth it.”

Talking of satisfaction, how's this?
Awful examples aside, there’s no finer feeling than maximising the use of a small space, squeezing in way more than you should. Because who doesn’t want to turn their utility room cupboard into the next Tardis?...
Why storage matters: it just does
Okay, but really, tool storage does matter. If you’re investing in tools, then you'll want to prevent damage to them - and that includes during storage. Because you reeeaaallly don't want the cost of repeatedly replacing them.

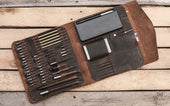
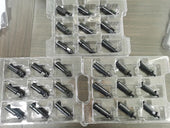
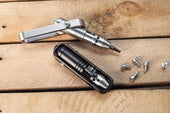
Keep your bits in a case
And then what’s more, although it seems obvious, you want to be able to find them when you need them too, right? Of course. Efficient tool storage solutions make tools accessible, improving your workflows whilst simultaneously preventing tool damage and protecting them against weather conditions (and, in some cases, you too!)
Paying the organisational price
Would you rather pay in lost and broken tools… or in organisational effort? Once you’ve built your foundations, organising tools for space-saving should be easy to stick to. Almost as easy as just throwing them in a cupboard or leaving them on the worktop for a few months... only a little more intentional.
When it comes to implementing tool organisation best practices, there are a few things to consider. For example, what tools you have, how you use them, what space you have available and even your individual preferences for using that space.

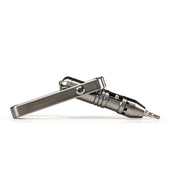
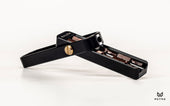
A haptically satisfying way to reduce organisational price… 3-in-1!
So to help you piece together an easy-to-stick-to storeganising strategy, consider some of the following ideas.
Best practices for tool organisation: tips, tricks and things to keep in mind
All good things start with a plan
Plan the plan. Then execute the plan’s plan. Now's the time to lay all your cards out on the workbench. What have you got to work with? What space do you have? What space could you have? What tools do you have? What tools do you need regularly? What inspired the glow-up? (E.g. to make your space look better or genuine functional benefits). Map out the non-negotiables and what your tool storage solution needs to accomplish.
Group by use case
Depending on how you plan to use your tools, you might consider grouping them by intended function. For example, a toolbox for bathroom-related jobs and a toolbox for kitchen-related jobs. Because unless you’re looking for an excuse to buy more tools, grouping them by use case means you’ll have a set of tools that’s quick, easy and ready to go when unexpected issues arise.
Group by material
In a similar breath, what are you working with? You could group your tools for wood-related tasks, metal, plastic and even electrical tasks. You’ll know where to head when you get your next DIY calling.
Group by tool
With some of the more in-demand and high-variance tools, you might group them by what they are. For example, rather than putting a few screwdrivers in a winter or woodwork box, you could put all your screwdrivers in an organised draw or on a pegboard. That way, when your screwdriver senses tingle, you know you’ll have them all raring to go (and hopefully in size order).
Group by season
Come rain, wind or shine, having a toolbox or tool storage section for the changing seasons could help speed up the work to be done. For example, as the colder seasons approach, having a home winter-proofing toolbox could make it less of a chore. Or, on the sunnier side, having a summer area of tools in your garage could speed up the process of getting your garden warm weather-ready.
Group by era
(Writer side story: An older gentleman who lived down my road as a kid had an infamous shed the length of his garden. As he gathered new tools, garden equipment, paint tins and whatever else people in the village didn’t want, he would keep extending his garage-come-shed to hold them all. Seriously. Every section was sort of bodged together into different eras with whatever materials he had lying around at the time. Even with this timeless approach to storing tools, nobody knew where to find anything but him. And to be honest, I think he struggled from time to time too…)
So, if you envision yourself gathering a lot of tools over the next 30-40 years, maybe you’d consider something similar and group them by decade, hobbies, or neighbours.
Look up
This one's more of a 'weatherproof tool storage option'. Because to prevent moisture from taking over, it makes a lot of sense to keep your tools off the floor. It’s also an effective way to maximise the space you have available. So, keep your regular, in-demand tools at body height (so they’re easy to get) and your less regular ones further up.
Listen to the manufacturers
We know it's tempting to go all ‘DIY tool storage’ and make everything yourself, but manufacturers' storage containers are practical and generally pretty good at keeping their contents safe. They might also offer additional guidance on specific conditions and maintenance to keep them working for longer. Consider following it.
Weather every storm
Weather conditions impact tools. Not in the sense that if they get wet, they feel sad. But rather, they don’t work… and (could) cost you a fortune.
For example, colder temperatures aren’t great for batteries, so you might consider sealing gaps from wind/water and even keep some areas more insulated and ventilated than others. In plastics, consistent temperatures are generally better too.
Ground moisture can be an issue for some tools, especially power ones. And if temperatures are cold enough, moisture can freeze, causing further damage to moving parts.
As a weatherproof tool storage option, try to keep the storage space at a constant temperature and well-ventilated. This might mean moving more vulnerable tools into insulated cabinets.
Heat it up
Not literally. (Sorry…) But if you really want to get to the nitty gritty and optimise your workshop/work area storage layout, consider recording your day-in-the-life movements to create a heat map and find hot spots. That way, you can then design in features that smoothen out any speed bumps and help streamline your workflows by making the tools you need most, most accessible. This is creative tool storage solution-finding at its finest.
From juussstt right… to “oh, uh…”
You need to account for scope creep. Realistically, you’re going to gain new tools as the years pass by - and having the perfect spot for everything right now might fill your ‘soul cup’... but gaining a new, unplanned-for-hammer or drill will only put a hole in it.
‘A place for everything and everything in its place’ is a short-term strategy. Think big. Account for new tools.
Drawers (can be) evil
Be mindful of your drawer use. They’re fine for irregular-use items, but for the tools you need yesterday, they’re not the wisest of storage solutions. Because before you know it, you’re rummaging through random bits of 4x2, dried-up glue tubes and dirty old rags to find the socket wrench you need. Listen to Adam Savage, he thinks it too.
Account for maintenance
Some tools need regular maintenance. And even if the manufacturer says nothing, it’s still good practice to clean them off after use. Whilst timestamping your tools with grease and grime sounds fun, seeing corrosion eat away at your vitals isn’t. For the tools that need TLC, keep them and the maintenance equipment easily accessible. The harder they are to find, the less likely you are to do it.
Make them easy to put away
Theory vs reality now. Because it’s all well and good having the perfect tool storage solution on paper, but if your tools are a pain in the thumb to put away, you’re not going to. So, make your tools easy to store so you can keep them organised. Colour coordinating - or colour tagging - might help you know where to put them faster.
16 ways to storeganise your tools
To stop your screwdriver from ending up in your sock drawer, let's look at some ways you can store and organise your tools around your garage, shed and workshop. Some suit the bits and bobs, others, the large awkward tools, but they all combine the tool storage tips and tricks above. That way, you can create something personal to you and your space.
#1 - The Lost in the Shadows
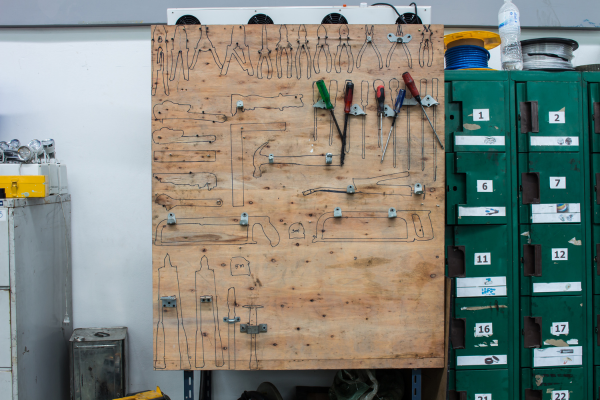
A shadow board can be a great way of organising (and remembering where to put) tools so you can find them quickly. Because if manufacturers can use them, why can’t you? Combine them with the next idea to make it even more versatile.

#2 - The Peg Up
Pegboards are great for the tools you need easy and regular access to. They’re usually not the best for heavier tools… but you, being the hands-on, free-thinking soul you are, can adapt them so they are. Rather than wooden backboards and pegs, you could ‘metal-morph’ it into something stronger.
Pegboards are also one of the more creative tool storage solutions, bringing flexibility, 'good looks', fame and honour to your growing tool collection. The only downside is that they’re not the most space-efficient. But if you’re battling ease of use and not generations of tools, you can give it a go.

#3 - The ‘Throw it and Hope’ (you find it again)
If you’re looking for a reason to buy new tools, this storeganising idea is screaming your name. See a space? Use it. Don’t see a space? Even better. They often say your outer world is a reflection of your inner world - and if your inner world looks like this, consider seeking help…

#4 - The Wall-e
Got an empty wall? Consider fitting some slatted wooden panels so you can add containers, strips or hooks to hang different tools on. That way, you can see where some of the bigger (or smaller) items go and pick them up without having to move your shed's contents. This forward-thinking, DIY tool storage idea caters for a growing tool collection too.
#5 - The Mag-e
Like the former, but magnetic. Replace/combine wooden strips and slats with magnetic strips, so you can hold saws, hammers and other metal tools. (They’re also sometimes fun to chuck pins at…)

#6 - The ‘CAUTION: Sharp around the edges’
If you like to live life on the wild side, wear hard hats or have areas of your workshop that aren’t paths through, consider hanging tools from a ceiling (or bike) rack. For the blunter, more head-friendly tools, you can be more experimental and put tool rack systems in a few places. But keep in mind that your head, windy days, sharp tools and this approach aren’t the bestest of friends...
For a more sensible approach, try this...
#7 - The Light and Fluffy
From swinging saws to fixed balls of foam. You can put things like pencils, chisels, and smaller paintbrushes in these. During a project, they could also become a (temporary) portable tool storage option because you could even put nails and screws in them to keep them in one place when you're working.
In either case, they’re easy to make, easy to see what’s in them and easy to move if you need to. Although, it’s probably better to fix them to a wall or put them on hooks - and not hang them from string, because... er... if not… see above.
#8 - The Under Cut Wood
Got a workbench? Use the space underneath it. You could have shelves, pullout draws or even just the large awkward items that don’t fit anywhere else. If you're working in a small space, this is a great way to optimise your workshop storage layout and prevent tool damage whilst you're working.

Yep, under one of these...
#9 - The At Wit’s End
Lost your bits and bobs for the 124th time? Try adding some end-of-cabinet storage instead. This is a great way of maximising your garage storage because most of us have a cabinet with dormant space. You can add containers, hook strips, magnetic strips, and even peg boards to cater for the tools and random bits that need a safe home.

Like this... but on the end of your cabinet
#10 - The If You Like It… Then You Shoulda Put A Cover On It
Shelves are an obvious storage idea. But turn them into cabinets and not only do you protect the contents but you also gain new storage locations. You've got the door (inside and outside) and the sides too. If this isn't an obvious (but efficient) tool cabinet organisation hack, then we don't know what is.
Generally, cabinets are fun to make (at least with a MetMo Pocket Driver). And you can custom-build them to suit your space, taste and intended contents.
If you want to go one step (or multiple steps) further, consider adding magnetic strips or a peg board to the front/inside/side of the cabinet door. And then a sneaky way to optimise your workshop storage layout, would be to also build them on lock wheels to move about - or even make them modular so you can pick up and move sections as and when you need to.
A final word of guidance: label or colour code them so you can see (quickly) what’s inside them.

We can dream, eh...
#11 - The For Box Sake
Another obvious but worthy storage solution here. Sometimes you have those big, awkward tools with random sticky-out bits - and they're always a pain to put anywhere tidily. So, to keep your space clutter-free, consider opting for a nice, big box (or tool vault depending on the tool) to put them in. It's a great weatherproof tool storage option too. That way, you can safely keep those cumbersome tools on shelves, in cabinets or under workbenches - and move them with far fewer tangles and potential painful plug-under-foot situations.

#12 - The Pinch of Pain
What about nuts, bolts, screws, nails and pins? A handy tool cabinet organisation hack is to store them in a trusty mason jar (or if you’re like the older fella up my road, then paint tins). Of course, you can put them on shelves too. Don’t forget to put - and keep - them in size order, though.

If you're of the over-engineering sort and happy to unplug blockages, you could try something soap-dispenser-esque. A little "push for nails" mechanism.
#13 - The Battery Pack
In today’s world, batteries are used for all sorts. They’re everywhere. And they need charging. Regularly. Because tools that have them are pretty useless when they’re out of juice. Duh.
So, it’s best to make them easy to find and easy to charge. Pack them into a designated area that combines battery storage and charging - ideally in an insulated room/area with a stable temperature to help weatherproof-ise them. If it's possible within your space, try to keep them in a cabinet. This can help keep them out of sight and help protect against theft (batteries can be quite pricey!).
#14 - The Train Ride
With rolling, stackable containers or cabinets, you can move your tools to areas that suit your immediate needs. For example, if you need multiple toolboxes/selections for a big summer project, you can pull them to an easy-access area of your space - or move them to the top of the pile. Learn how to make some.
What’s more, as your tool collection grows, your container volume can too. You can use smaller or larger ones.
And then if you really want to go the extra mile and optimise your workshop's storage layout, consider using your containers as a dynamic workbench. Stack them with a worktop when you need them, then store them away and use the space for something else when you don't.
Optional extras for smaller rolling cabinets: cabinet connectors, a small chair and a bell. Chuu chuu.
#15 - The Friday Night Special
The big guns. The special occasion tools. They don’t come out often, but when they do, they’re great. One of the most overlooked best practices of tool organisation is to keep your favourites in an area where you can sit and idolise them whilst you work (enjoyment matters, no?). You might want to keep these in an area by themself - or if you really want to, in a frame.
#16 - The Leftovers
And then what about all the bits and bobs that don’t fit anywhere else? The inevitable misfits. Consider a humble worktop tray or old toolbox on a shelf. Or, look Adam Savage in the eyes and opt for a drawer.

Some leftover guidance
Consider this the odds and sods tray of the article: useful information with nowhere to store it. Let’s have a gander and dive right in.
A case for the originals
Where possible, keep your power tools in their original cases. They’re a simple, cheap and great way to keep dust and moisture out of your tools while you're storing them. So not only are you protecting against damage in storage, but rust and corrosion too.
What's more, original cases are also a space-efficient way to store tool extras/accessories like chargers, blades and bits. With a lot of power tools, the accessories and specific chargers (especially across brands) can get confusing and hard to manage. So, when it comes to organising tools for space-saving, sometimes it’s just easier to keep them in their case so you can quickly identify them and know all their parts are there too.

No lust for rust
Next, if you’re opting for drawers, much to Adam Savage’s dismay, consider anti-rust liners. Rust prevention in tool storage is a serious business - with a simple fix. Anti-rust liners emit a special vapour that protects the drawers’ contents against corrosion.
For toolboxes, try anti-rust tablets, and for individual tools, anti-rust tape - together, they can provide extra protection so your tools last longer. Just make sure you use the right amount of lining/tablets/tape in the enclosed space.
Shutting the cabinet door on efficient tool storage ideas
And there you have it. A cabinet full of tool organisation best practices, tips and tricks and ways of efficiently storing your tools. You've seen some serious and not-so-serious ways - with a few opportunities for 'creative tool storage' expression too.
If you’re lucky, as you reorganise your tools, you might find tools you thought you’d lost - or even an excuse to buy more*. We can only hope, eh?
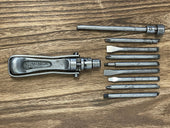
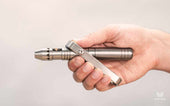
*Shameless plug: If you are looking to buy more tools, take a look at the MetMo Driver, Pocket Driver and Grip - they’re some of our favourite (and most popular) creations.

|
 |
 |











Share:
To invest or not to invest: Are quality tools worth the price tag?
Pocket Driver: Origins, Development & Production