The Idea

So, where did this idea originate? After we finished our driver campaign, we asked a question on our community forum - 'what tool you would find useful?' and there were some really interesting responses, including a smaller more portable version and something that would be make a better T-Driver for hex keys... And with that the vision was clear, combine these things, add some engineering wisdom from the past and see if we can bring something interesting and useful to life!

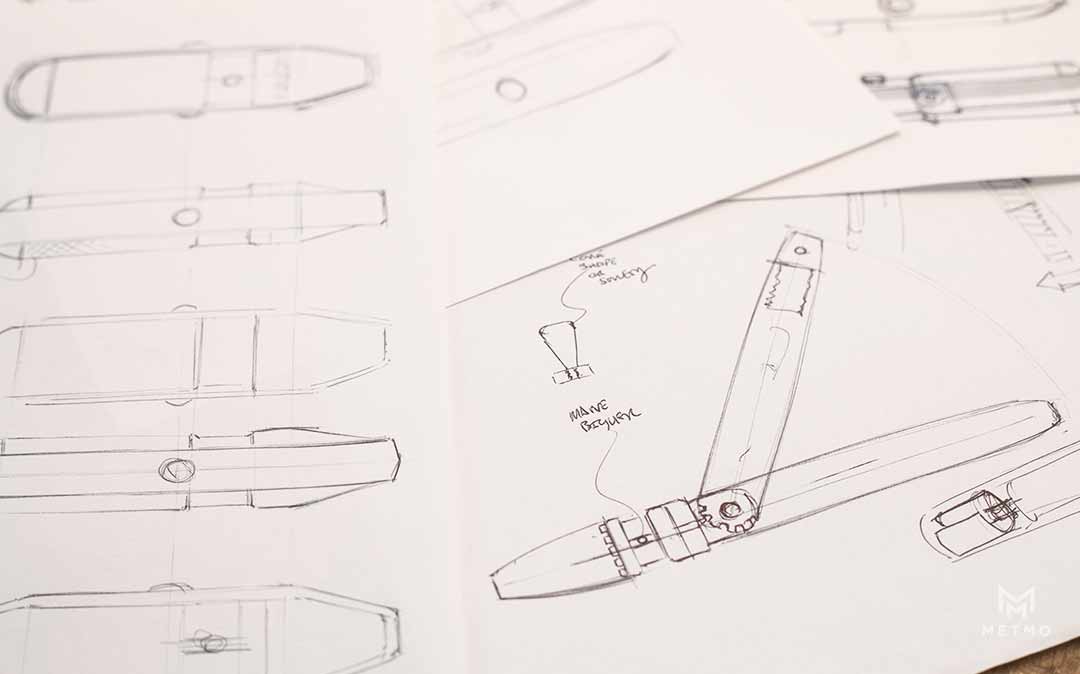
We start with sketching out the concepts of what it could look like, the desired sizes and imagine what it needs to do.

We also use this CAD data to undertake some basic computerised stress analysis to try and understand things like; where load stresses will effect the handle and what component should fail first for safety purposes.
Development Challenges (3D Printing)

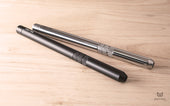
3D Print Vs Finished machined design
The next stages are taking the CAD data from Solidworks and 3D printing some parts. The parts are printed in plastic so we normally have to modify the design to print something strong enough so that it will work well enough to have a play around with.
For instance, with the Pocket Driver we were able to adjust the pivot point of the handle so that it was much more comfortable to hold in one hand. After the first attempt was not quite right it took three modifications to get that perfect.
We originally started with a U shaped handle like the original Driver, but that proved very unwieldily to use single handed and we moved to a 'Pistol grip' design fairly quickly.
The advantage with doing it like this, is the speed! In a day you can have something ready to test and play with before going into metal.
It's Heavy Metal Time!
This part of the process we filmed and was part of our first update, but just in case you didn’t see it or are new to the campaign, you can watch it below.
Other than learning that the non-standard tap size we use on the cap of the driver are a real pain to prototype! The making of the first metal prototype helped us identify;
- Any difficult to machine areas
- Parts that are difficult to hold in machinery
- Any errors in the production drawings
It also identifies any additional machining steps that might be required and checks the designed tolerances are correct, so the parts work as they need to. This stage identified a number of things with the pocket driver, from;
- dialling the strength of the spring
- identifying burs around the chuck
- perfecting the machined finish of the stainless Pocket Driver
Among a few other tweaks, all were noted and modified along the way.
Production-isation
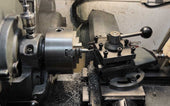
This stage is where we start to get the real machines that will make the parts involved and where it gets expensive and takes much longer to change something.
At this point we have the parts machined out of the correct metals, get them sent to the various places for surface finishing and hardening and see what goes wrong.

In all the years we have been doing this, at least one part will go sideways somewhere, that then needs modifying. The winner of the Christmas turkey this time was the custom screws we had made, that were first lost in a finishing factory and then just made totally the wrong size second time... Still can't work out how that happened.
Samples Incoming!

At the end of that process we have enough parts to make a driver and give it a damn good testing, pushing the parts to breaking point. This identifies any unforeseen weaknesses and is a good opportunity to cross reference results with the earlier stress analysis.
Pre-Production
This is what brings us to present day, but we can touch on the process and have a quick look at what we did at this point in the previous campaign for the big driver.
At the moment of writing this these are in production and they are a batch of 20 of each part that test the reproducibility of the parts at a small scale. Often this identifies issues like;
- Inconsistencies in metal finishing, like we had with the big driver when we introduced the grey colour, that we can then use as quality control checks in the final batch.
- Inconsistent tolerances. This can lead to wobbly shafts on one end or components seizing up on the other end!
- Overall quality drop. Often machine shops send out perfect samples and then drop to potato quality in full production. Been there... it sucks and usually involves us spending countless nights polishing metal or removing burs!
A funny bit that happened on the big drivers is that due to the use of the wrong kind of thread lock glue, 15 of the 20 drivers ended up permanently stuck together as the glue ran deep inside the drivers… ending them. The final driver didn’t use any glue in the end but this is the kind of thing that pre-production runs stop!
Final Production
There is a whole process of quality checking and control throughout this stage, but that is for another update and gets us to the point where we can begin the production of the final batches.
Making a Pocket Pack
From sketch to realisation, a surprising amount of work goes into the add-ons and extras in the campaign. The leather parts start in a similar way, from a sketch and a list of key things that we want the product to do.

The difference with any fabric based product is that 3D design software sucks at making it well! So, the best move is to go straight in to mocking things up out of paper or velum (that is just a fancy tracing paper that holds together better.)

From that initial mock-up, basic patterns can be made to make a rough version in leather. The nice thing about working with leather though, is that it is quite quick to have working samples and sew on extra bits if things are too short or an idea comes along during the process.
After a couple of cycles of tinkering, we dismantle the design and turn the flat parts in to digital patterns that are then printed, and a final sample is made from that in the real material we plan to use.
Then its final mods, tweaks to the pattern and hey presto! You have yourself a Pocket Pack! I won’t go into all the fun of then getting that manufactured because we'll be here all day! But this gets us to what you see here in the campaign!

From Right: Early fabric prototypes to the finalised prototype on the left.
The Barrel Extender In Black
We get asked this one quite a bit. Sometimes the add-ons are a bit limited and with the way we have made the extender, it means that in aluminium they are getting quite thin and given the forces involved in using them we don’t want to risk anything bending. It would also result in the aluminium becoming a bearing surface, which in engineering is generally not a great! It’s like going to run a marathon in flip flops, it can be done but you will regret it! The way we have It now reduces the colour options, but results in a better product at the end of the day.
I hope all of this has been interesting and as always if you have any questions, feel free to reach out and I would be happy to help!

Share:
Storeganising: How to store your tools the right way
Pocket Driver: Pre-Production Run